Dalam era aplikasi modern, komunikasi real-time menjadi kebutuhan utama. Salah satu cara efektif untuk menjaga interaksi dengan pengguna adalah melalui push notification. Pada tulisan ini, kita akan membahas bagaimana mengintegrasikan Firebase dengan Laravel untuk mengirim notifikasi yang cepat, andal, dan mudah dikelola.
Nah, sebelum kita mulai ngoding, ada satu hal penting yang harus disiapkan dulu: akun Firebase. Dari sinilah kita akan mendapatkan “kunci” yang dibutuhkan Laravel untuk mengirim notifikasi ke perangkat. Caranya cukup mudah: buat project baru di Firebase Console, lalu simpan data seperti Server Key dan Sender ID yang nanti akan kita gunakan di Laravel.
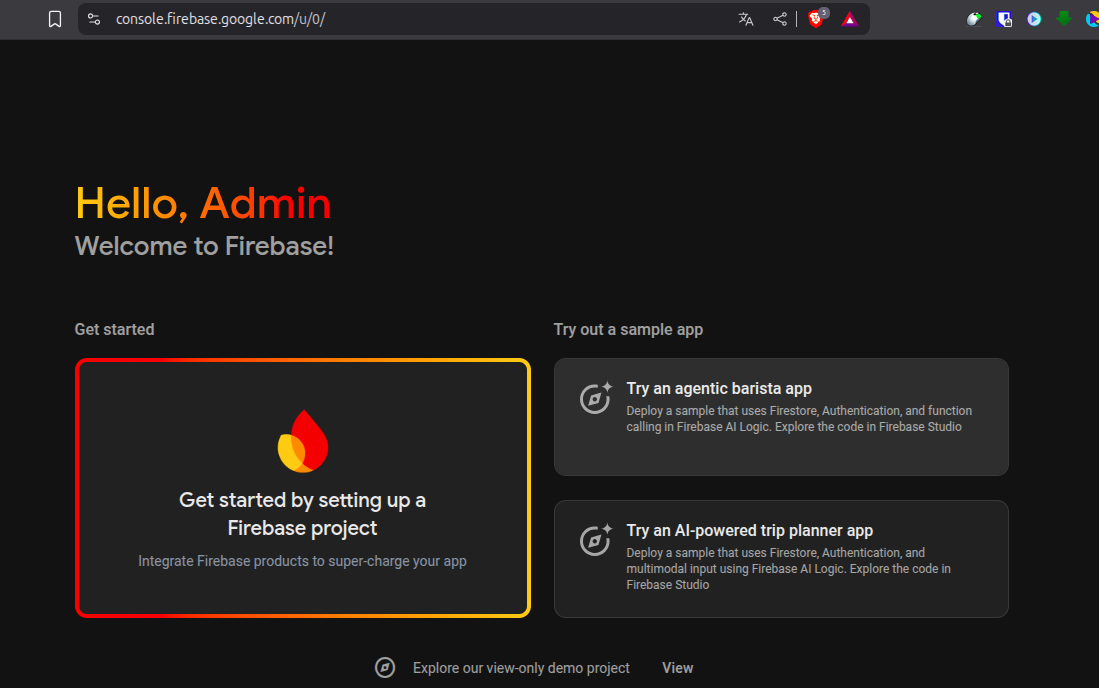
Caranya gampang kok. Tinggal buka Firebase Console, klik Add Project, kasih nama sesuai kebutuhan, lalu ikuti langkah-langkah sampai selesai. Begitu project jadi, masuk ke menu Project Settings dan pilih tab Cloud Messaging. Di sana kamu bakal nemuin Server Key dan Sender ID yang jadi “senjata” utama kita untuk menghubungkan Firebase dengan Laravel.
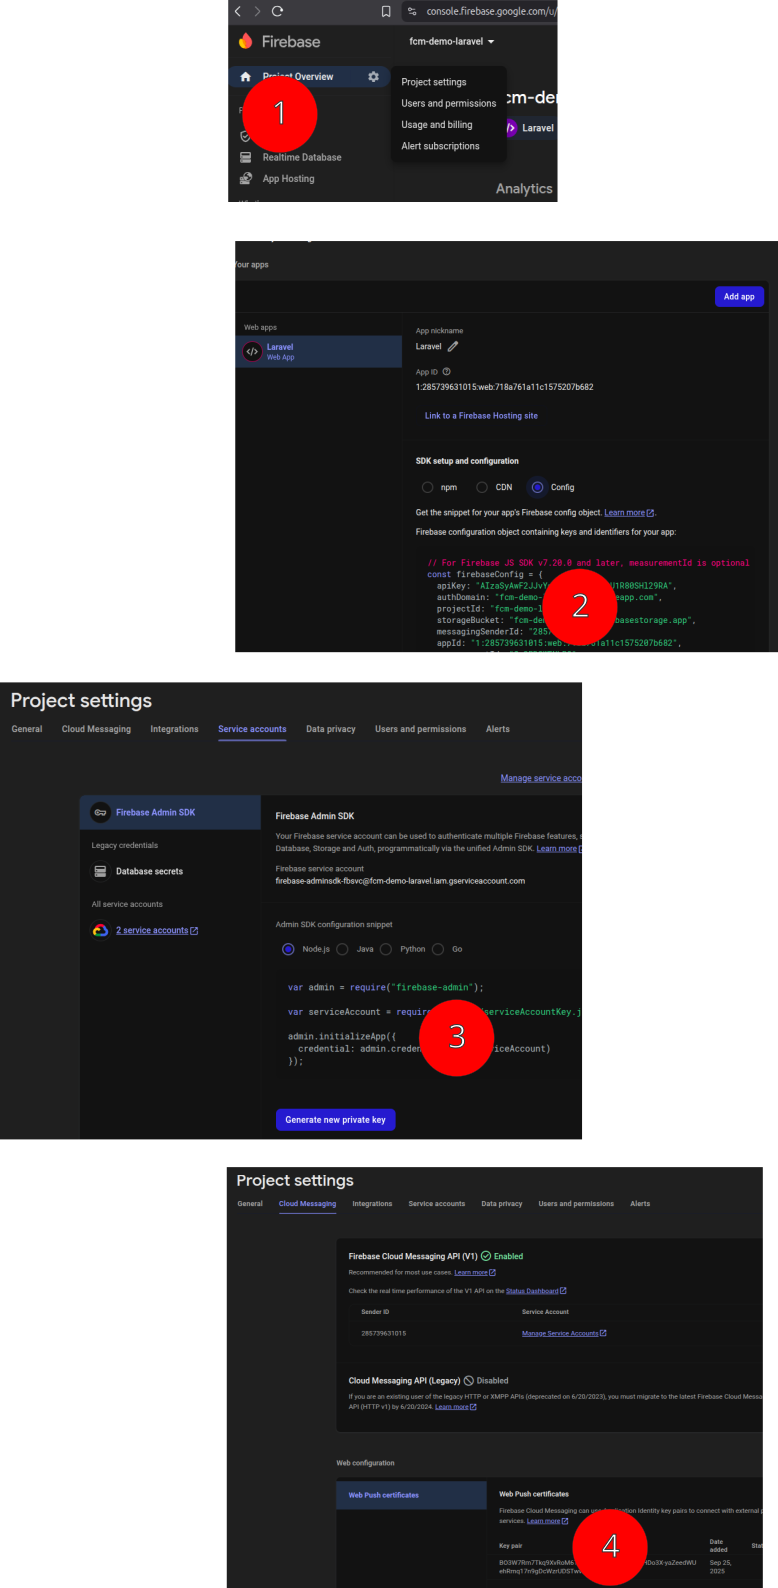
Di step nomor 1 pilih project setting. Lanjut ke step 2 untuk membuat aplikasi yang akan menggunakan firebase ini. Di step 2 ini terdapat config yang akan dipakai di aplikasi. Lanjut ke step 3 untuk mendapatkan key server. Ini akan mendapatkan file json. Ke step terakhir di firebase yaitu mendapatkan Key pair dimana untuk mendapatkan FCM token dari sisi client nya nanti. Key pair ini akan digunakan sebagai Vapid Key di sisi client.
Nah sekarang langsung ke bagian Laravelnya ya. Tinggal install laravelnya saja
composer create-project laravel/laravel firebase-notification

cd firebase-notification
1) Install & konfigurasi dasar
composer require kreait/laravel-firebase

php artisan vendor:publish --provider="Kreait\Laravel\Firebase\ServiceProvider" --tag=config
Letakkan file credentials JSON (service account) di storage/app/firebase/firebase_credentials.json mis. dan tambahkan di .env:
FIREBASE_CREDENTIALS=/full/path/to/storage/app/firebase/firebase_credentials.json
2) Migration & Model (simpan token perangkat)
Buat migration:
php artisan make:migration create_fcm_tokens_table --create=fcm_tokens
database/migrations/xxxx_xx_xx_create_fcm_tokens_table.php
<?php

use Illuminate\Database\Migrations\Migration;
use Illuminate\Database\Schema\Blueprint;
use Illuminate\Support\Facades\Schema;

class CreateFcmTokensTable extends Migration
{
    public function up()
    {
        Schema::create('fcm_tokens', function (Blueprint $table) {
            $table->id();
            $table->foreignId('user_id')->nullable()->constrained()->onDelete('cascade');
            $table->string('token')->unique();
            $table->string('platform')->nullable(); // android, ios, web
            $table->timestamp('last_seen_at')->nullable();
            $table->boolean('is_active')->default(true);
            $table->timestamps();
        });
    }

    public function down()
    {
        Schema::dropIfExists('fcm_tokens');
    }
}
Model app/Models/FcmToken.php:
<?php

namespace App\Models;

use Illuminate\Database\Eloquent\Model;

class FcmToken extends Model
{
    protected $fillable = ['user_id', 'token', 'platform', 'last_seen_at', 'is_active'];

    public function user()
    {
        return $this->belongsTo(\App\Models\User::class);
    }
}
3) PushNotificationService (core — gunakan Kreait DI)
Buat service: app/Services/PushNotificationService.php
<?php

namespace App\Services;

use Kreait\Firebase\Contract\Messaging;
use Kreait\Firebase\Messaging\CloudMessage;
use Kreait\Firebase\Messaging\Notification;
use Kreait\Firebase\Exception\MessagingException;
use App\Models\FcmToken;
use Illuminate\Support\Facades\Log;

class PushNotificationService
{
    protected Messaging $messaging;

    public function __construct(Messaging $messaging)
    {
        $this->messaging = $messaging;
    }

    protected function normalizeData(array $data): array
    {
        // all keys/values must be strings for FCM data payload
        return array_map(fn($v) => (string)$v, $data);
    }

    public function sendToToken(string $token, string $title, string $body, array $data = []): array
    {
        $message = CloudMessage::withTarget('token', $token)
            ->withNotification(Notification::create($title, $body))
            ->withData($this->normalizeData($data));

        try {
            $this->messaging->send($message);
            return ['ok' => true];
        } catch (MessagingException $e) {
            Log::warning('FCM sendToToken error', ['token' => $token, 'e' => $e->getMessage()]);
            return ['ok' => false, 'error' => $e->getMessage()];
        } catch (\Throwable $e) {
            Log::error('FCM unknown error', ['e' => $e->getMessage()]);
            return ['ok' => false, 'error' => $e->getMessage()];
        }
    }

    /**
     * sendMulticast: kirim ke banyak token. Chunk tokens untuk menghindari limit.
     * Perhatikan limit / performa — chunk default 500.
     */
    public function sendMulticast(array $tokens, string $title, string $body, array $data = [], int $chunkSize = 500): array
    {
        $message = CloudMessage::new()
            ->withNotification(Notification::create($title, $body))
            ->withData($this->normalizeData($data));

        $result = [
            'success' => 0,
            'failure' => 0,
            'invalid_tokens' => [],
            'unknown_tokens' => [],
        ];

        $chunks = array_chunk(array_values($tokens), $chunkSize);
        foreach ($chunks as $chunk) {
            try {
                $report = $this->messaging->sendMulticast($message, $chunk);
                $result['success'] += $report->successes()->count();
                $result['failure'] += $report->failures()->count();

                // collect tokens to cleanup if needed
                $result['invalid_tokens'] = array_merge($result['invalid_tokens'], $report->invalidTokens());
                $result['unknown_tokens'] = array_merge($result['unknown_tokens'], $report->unknownTokens());
            } catch (\Throwable $e) {
                Log::error('FCM sendMulticast error', ['e' => $e->getMessage()]);
            }
        }

        // cleanup tokens from DB if invalid/unknown
        $bad = array_unique(array_merge($result['invalid_tokens'], $result['unknown_tokens']));
        if (!empty($bad)) {
            FcmToken::whereIn('token', $bad)->delete();
        }

        return $result;
    }

    public function sendToTopic(string $topic, string $title, string $body, array $data = []): array
    {
        $message = CloudMessage::withTarget('topic', $topic)
            ->withNotification(Notification::create($title, $body))
            ->withData($this->normalizeData($data));

        try {
            $this->messaging->send($message);
            return ['ok' => true];
        } catch (\Throwable $e) {
            Log::error('FCM sendToTopic error', ['topic' => $topic, 'e' => $e->getMessage()]);
            return ['ok' => false, 'error' => $e->getMessage()];
        }
    }

    // Topic management (subscribe/unsubscribe)
    public function subscribeTokensToTopic(string $topic, array $tokens): array
    {
        try {
            $res = $this->messaging->subscribeToTopic($topic, $tokens);
            return ['ok' => true, 'result' => $res];
        } catch (\Throwable $e) {
            Log::error('FCM subscribeToTopic error', ['topic' => $topic, 'e' => $e->getMessage()]);
            return ['ok' => false, 'error' => $e->getMessage()];
        }
    }

    public function unsubscribeTokensFromTopic(string $topic, array $tokens): array
    {
        try {
            $res = $this->messaging->unsubscribeFromTopic($topic, $tokens);
            return ['ok' => true, 'result' => $res];
        } catch (\Throwable $e) {
            Log::error('FCM unsubscribeFromTopic error', ['topic' => $topic, 'e' => $e->getMessage()]);
            return ['ok' => false, 'error' => $e->getMessage()];
        }
    }
}
4) Controller & routes
Controller app/Http/Controllers/FcmController.php
<?php

namespace App\Http\Controllers;

use Illuminate\Http\Request;
use App\Models\FcmToken;
use App\Services\PushNotificationService;
use Illuminate\Support\Facades\Auth;

class FcmController extends Controller
{
    public function storeToken(Request $req)
    {
        $req->validate(['token' => 'required|string', 'platform' => 'nullable|string']);

        $userId = Auth::id();

        $token = $req->input('token');
        $platform = $req->input('platform', 'web');

        FcmToken::updateOrCreate(
            ['token' => $token],
            ['user_id' => $userId, 'platform' => $platform, 'last_seen_at' => now(), 'is_active' => true]
        );

        return response()->json(['ok' => true]);
    }

    // simple admin blade for testing
    public function adminForm()
    {
        return view('notifications.send'); // nanti buat blade di resources/views/notifications/send.blade.php
    }

    public function send(Request $req, PushNotificationService $push)
    {
        $req->validate([
            'target_type' => 'required|in:token,tokens,topic,all',
            'title' => 'required|string',
            'body' => 'required|string',
            'token' => 'nullable|string',
            'tokens' => 'nullable|string', // comma separated
            'topic' => 'nullable|string',
        ]);

        $title = $req->title;
        $body = $req->body;

        if ($req->target_type === 'token') {
            return $push->sendToToken($req->token, $title, $body);
        }

        if ($req->target_type === 'tokens') {
            $tokens = array_filter(array_map('trim', explode(',', $req->tokens)));
            return $push->sendMulticast($tokens, $title, $body);
        }

        if ($req->target_type === 'topic') {
            return $push->sendToTopic($req->topic, $title, $body);
        }

        if ($req->target_type === 'all') {
            $tokens = \App\Models\FcmToken::pluck('token')->toArray();
            return $push->sendMulticast($tokens, $title, $body);
        }

        return ['ok' => false, 'error' => 'unknown_target'];
    }
}
Routes (tambahkan di routes/web.php atau routes/api.php sesuai kebutuhan):
use App\Http\Controllers\FcmController;

Route::post('/fcm/token', [FcmController::class, 'storeToken']); // client calls to register token
Route::get('/admin/notifications', [FcmController::class, 'adminForm'])->middleware('auth');
Route::post('/admin/notifications/send', [FcmController::class, 'send'])->middleware('auth');
5) Blade (admin) — contoh sederhana
@extends('layouts.app')

@section('content')
<div class="container">
  <h3>Kirim Notifikasi</h3>

  <form id="sendForm" method="POST" action="{{ url('/admin/notifications/send') }}">
    @csrf
    <div>
      <label>Target</label>
      <select name="target_type" id="target_type">
        <option value="topic">Topic</option>
        <option value="token">Single Token</option>
        <option value="tokens">Multiple Tokens (comma)</option>
        <option value="all">All (DB)</option>
      </select>
    </div>

    <div id="tokenField" style="display:none">
      <input name="token" placeholder="device token">
    </div>

    <div id="tokensField" style="display:none">
      <textarea name="tokens" placeholder="token1,token2,..."></textarea>
    </div>

    <div id="topicField">
      <input name="topic" placeholder="topic name (e.g. news)">
    </div>

    <div><input name="title" placeholder="Judul" required></div>
    <div><textarea name="body" placeholder="Isi pesan" required></textarea></div>

    <button type="submit">Kirim</button>
  </form>
</div>

<script>
document.getElementById('target_type').addEventListener('change', function() {
  const t = this.value;
  document.getElementById('tokenField').style.display = t === 'token' ? 'block' : 'none';
  document.getElementById('tokensField').style.display = t === 'tokens' ? 'block' : 'none';
  document.getElementById('topicField').style.display = t === 'topic' ? 'block' : 'none';
});
</script>
@endsection
6) Client-side (Web) — contoh mendapatkan token & mendaftarkan ke server
- Siapkan
firebase-messaging-sw.jsdipublic/:public/firebase-messaging-sw.js
importScripts('https://www.gstatic.com/firebasejs/9.22.2/firebase-app-compat.js');
importScripts('https://www.gstatic.com/firebasejs/9.22.2/firebase-messaging-compat.js');

firebase.initializeApp({
  apiKey: "YOUR_API_KEY",
  authDomain: "PROJECT_ID.firebaseapp.com",
  projectId: "PROJECT_ID",
  messagingSenderId: "SENDER_ID",
  appId: "APP_ID"
});

const messaging = firebase.messaging();

messaging.onBackgroundMessage(function(payload) {
  const { title, body } = payload.notification || {};
  self.registration.showNotification(title || 'Notification', {
    body: body || '',
    // icon: '/icon.png'
  });
});
- Di halaman (blade/client) untuk mendapatkan token:
<!-- include module or compat scripts -->
<script type="module">
  import { initializeApp } from "https://www.gstatic.com/firebasejs/9.22.2/firebase-app.js";
  import { getMessaging, getToken, onMessage } from "https://www.gstatic.com/firebasejs/9.22.2/firebase-messaging.js";

  const firebaseConfig = {
    apiKey: "YOUR_API_KEY",
    authDomain: "PROJECT_ID.firebaseapp.com",
    projectId: "PROJECT_ID",
    messagingSenderId: "SENDER_ID",
    appId: "APP_ID"
  };

  const app = initializeApp(firebaseConfig);
  const messaging = getMessaging(app);

  // ambil VAPID key dari Firebase Console (Web push certificates)
  const VAPID_KEY = "YOUR_PUBLIC_VAPID_KEY";

  async function registerTokenToServer() {
    try {
      const currentToken = await getToken(messaging, { vapidKey: VAPID_KEY });
      if (currentToken) {
        // kirim ke server
        await fetch('/fcm/token', {
          method: 'POST',
          headers: {
            'Content-Type': 'application/json',
            'X-CSRF-TOKEN': document.querySelector('meta[name="csrf-token"]').getAttribute('content')
          },
          credentials: 'same-origin',
          body: JSON.stringify({ token: currentToken, platform: 'web' })
        });
        console.log('FCM token registered:', currentToken);
      } else {
        console.log('No registration token available. Request permission to generate one.');
      }
    } catch (err) {
      console.error('An error occurred while retrieving token. ', err);
    }
  }

  // panggil saat halaman siap / setelah user memberi izin notifikasi
  registerTokenToServer();

  // handle pesan foreground
  onMessage(messaging, (payload) => {
    console.log('Message received. ', payload);
    // tampilkan notifikasi custom jika mau
  });
</script>
Untuk mendapatkan VAPID public key: buka Firebase Console → Project settings → Cloud Messaging → Web configuration → Web Push certificates → Generate Key Pair (atau ambil key existing).
7) Chunking / skala / topic tips
sendMulticastuseful untuk banyak token, namun jangan kirim terlalu banyak sekaligus — chunk ke batch (umumnya 500) untuk menghindari error. Jika audiens besar, lebih efisien pakai topic. Firebase Admin SDK for PHP+1- Untuk subscribe/unsubscribe topic kamu bisa gunakan
subscribeToTopic/unsubscribeFromTopicdari SDK. Per satu request dapat mendaftarkan sampai ~1.000 devices (per request). Untuk jumlah besar, gunakan chunking. Firebase+1
8) Membersihkan token yang invalid
Pada response sendMulticast SDK memberikan invalidTokens() dan unknownTokens() — sebaiknya hapus/dinonaktifkan token-token itu dari DB. Contoh di service sudah men-delete token invalid/unknown.
9) (Opsional tapi sangat direkomendasikan) Jalankan pengiriman di Queue
Untuk scale / UI responsiveness, dispatch sebuah Job (Laravel queue) yang memanggil PushNotificationService::sendMulticast(...). Contoh singkat job:
php artisan make:job SendPushNotificationJob
app/Jobs/SendPushNotificationJob.php:
// in handle(): $this->pushService->sendMulticast($this->tokens, $this->title, $this->body, $this->data);
Jalankan worker: php artisan queue:work (atau supervisor di production).
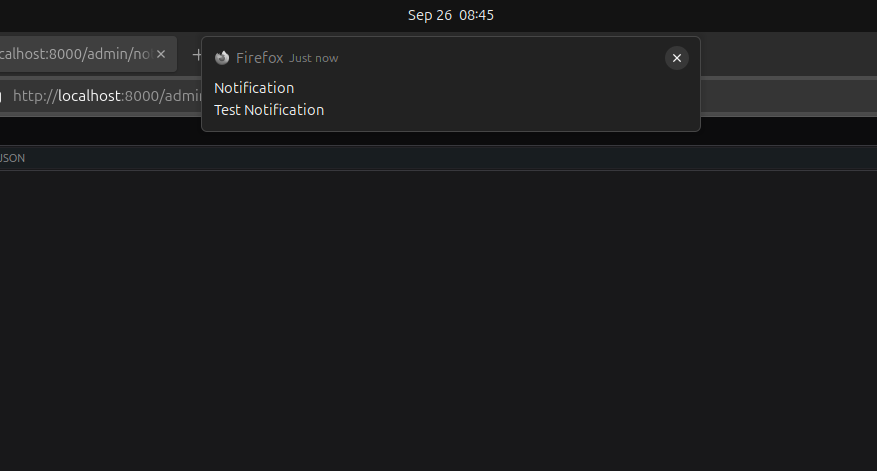
10) Testing & debugging
- Test endpoint
/fcm/tokendari client web/mobile untuk memastikan token tersimpan. - Kirim notifikasi single token lalu cek device.
- Lihat logs jika ada
MessagingException— SDK mengubah error FCM jadi exception yang bisa kamu inspect.